Catalog Items
Use this function to create a structured document for IT live Services reflecting items that are ready for deployment. It is the only part that is published to end-users, and includes support for sales and delivery, as well information on deliverables, processes, and available quantities.
In the navigation pane, select ITSM > Service Portfolio > Service Catalog > Catalog Items.
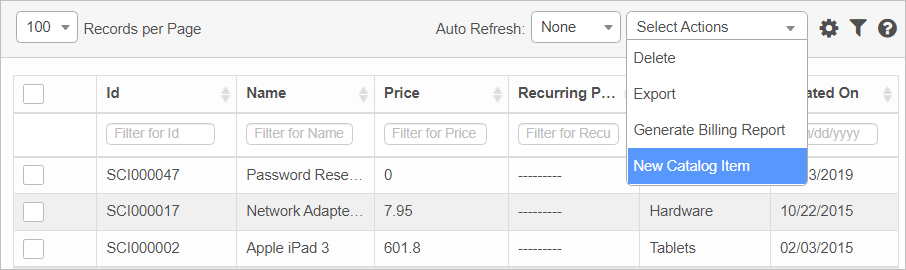
![]()
| 1. | From the Select Actions drop-down list, choose New Catalog Items. The New Catalog Item window displays. |
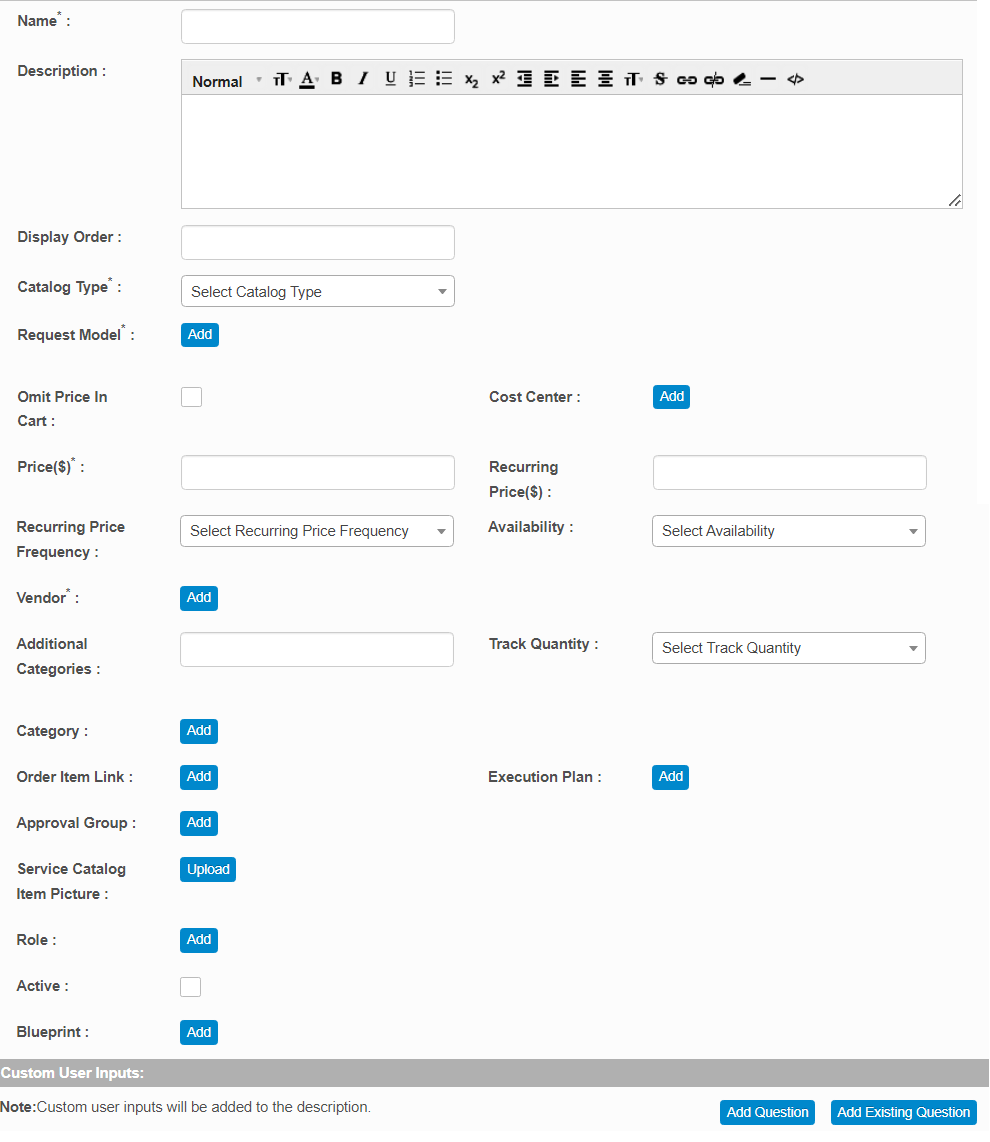
| 2. | Complete the fields, referring to the table below. |
| 3. | When all selections/entries are made, click Add. |
Catalog Item Fields
| Field | Description | ||
|---|---|---|---|
| Name | Enter the name of the catalog item. | ||
| Description | Enter details about this catalog item. | ||
| Display Order | Enter a number indicating the location for this item in the catalog. | ||
| Catalog Type |
Click the drop-down list and select the catalog type. Options include: Service Request. Creates a service request for situations such as password reset, failed login and so forth.
Issue. Creates an issue.
Product. Indicates a product requirement was a iPhone, laptop, and so forth.
|
||
|
Request Model |
Click Add then search for and select the applicable request model. |
||
|
Omit Price in Cart |
Select to hide the catalog price during shipping. |
||
|
Cost Center |
Designates the part of the organization to which the cost will be applied. Used for accounting purposes. This is a required field. Click Add then search for and select the applicable cost center. |
||
|
Price ($) |
Enter the price for this catalog item. |
||
|
Recurring Price ($) |
Enter the price incurred repeatedly for the requested item. |
||
|
Recurring Price Frequency |
Click the drop-down list and select how often this recurring price occurs such as Daily, Annually, etc.
|
||
|
Availability |
Click the drop-down list and select Yes if this item is available. Otherwise, select No. |
||
|
Vendor |
If shown, this is a required field. Click Add then search for and select the applicable vendor from whom the item can be obtained. |
||
|
Additional Categories |
Enter the category names for the requested item such as Desktop Support, Facilities and so forth. |
||
|
Track Quantity |
Click the drop-down list and select Yes if the quantity for this item should be tracked. Otherwise, select No. |
||
|
Category |
Click Add then search for and select the applicable category for this item. |
||
|
Order Item Link |
Click Add then search for and select the applicable link to view additional information for this catalog item. |
||
|
Execution Plan |
Click Add then search for and select the applicable plan to execute for this item. The Execution Plan contains predefined steps to execute the request. |
||
|
Approval Group |
Click Add then search for and select the applicable group to approve this catalog item. |
||
|
Service Catalog Item Picture |
Click Add then Browse and select the image. Once located, click OK. Click the plus + sign then Browse and select the image. Once located, click the Upload button. |
||
|
Role |
If a role is set, then only the specified role will be allowed to place an order for the item. Click Add then search for and select the applicable role assigned to this catalog item. |
||
|
Active |
Select Active to display the item in the catalog.
|
||
|
Blueprint |
Click Add then search for and select the applicable blueprint. |
Add Question
Use this function to enable the user to add questions (fields) to the catalog item form.
| 1. | Under Custom User Inputs, click Add Question. The Add Question dialog box displays. |
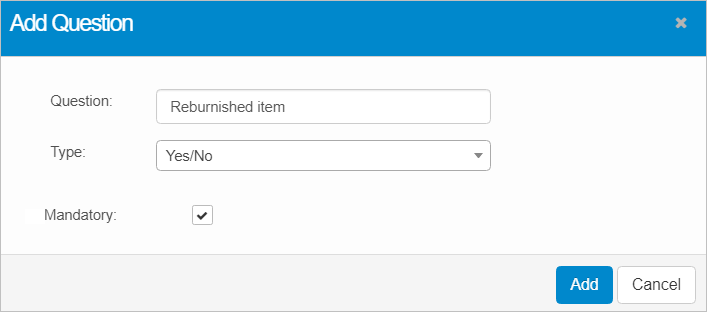
| 2. | In the Question field, enter a question. |
| 3. | In the Type field, click the drop-down list arrow and select the applicable filed format type such as Check Box, Date/Time and so forth. |
| 4. | If this is a mandatory question, select Is Mandatory. |
| 5. | Click Add. |
Add Existing Question
Use this function to select an existing question in the database and add it to the current catalog item form.
| 1. | Under Custom User Inputs, click Add Existing Question. The Add Question dialog box displays. |
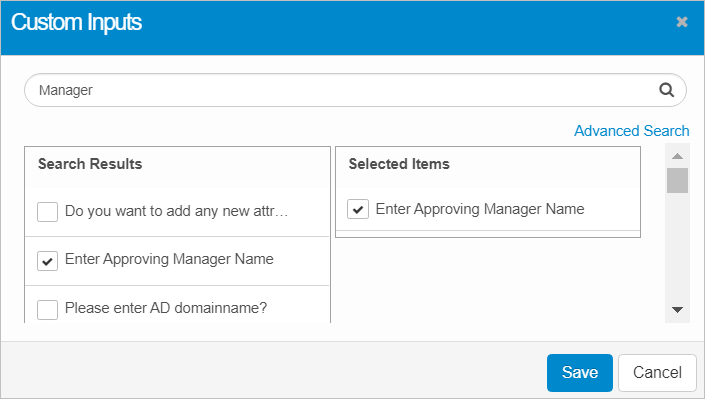
| 2. | Search for and select the question to add to the form. More than one question can be added. |
| 3. | Click Save. |
| 1. | In the main window, from the Select Actions drop-down list, choose Generate Billing Report. The Generate Billing Report dialog box displays. |
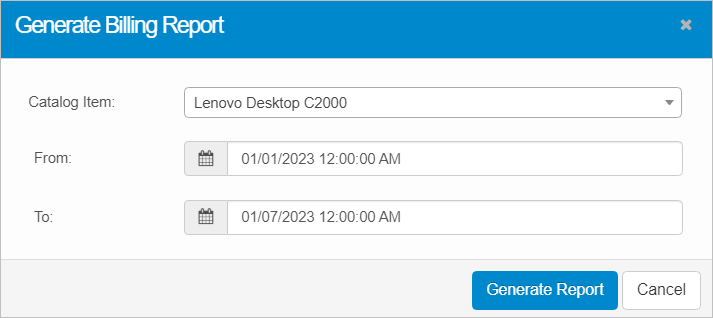
| 2. | In the Catalog Item field, click the drop-down list and select the item for which a billing report is to be generated. Select All if the report should contain every catalog item. |
| You can either select all items or a single item. There is no option to select multiple, individual items. |
| 3. | In the From and To fields, select a date/time. |
| 4. | Click Generate Report. |
| Not all functions include an option to edit record line items shown in the main window. |
| 1. | Navigate to the window containing the record to edit. |
| 2. | Click the line containing the record. The applicable window or dialog box displays. |
| 3. | Make the necessary modifications. |
| 4. | Click Save or Add, as applicable. |
When editing an existing item, other options may be available, such as adding Tasks, Comments, and Attachments and viewing History.
| The options change based upon the function; therefore, not every option may be shown. |
| Deleting is a permanent action and cannot be undone. Deleting may affect other functionality and information in the application such as data in configured reports, fields in windows, selectable options, etc. Therefore, be sure to understand the potential effects before making a deletion. |
| 1. | Click the line that contains the item to delete. |
| 2. | From the Select Actions drop-down list, choose Delete. If a confirmation message is displayed, take the appropriate action (for example, click OK or Continue). |
Other Functions and Page Elements