Client
The Discovery Application is installed in data centers to discover the host's communication in the Enterprise network. In the case of multiple data centers in different locations, the Discovery Application must be installed on one machine at every data center.
Every machine on which the Discovery Application is installed is referred to as a "Client," and each machine is added during the Virima installation process.
![]()
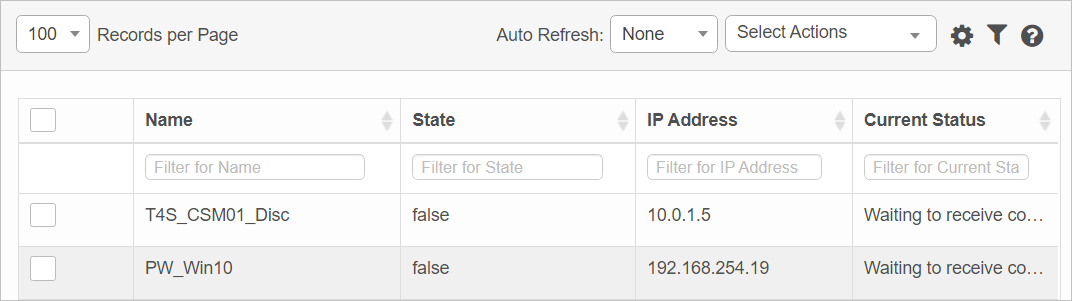
In the main window, click Admin > Discovery > Client. The Client window displays.
Search Options
The following search functionality is available when working in this window.
| Field | Description |
|---|---|
| ID | Number generated by the application on client configuration. |
| Name | Client Name |
| State | Current state, either "True (the Discovery Application is running)" or "False" (the Discovery Application is not running). |
| Host Name | Host name |
| IP Address | Identifies the client/host. |
| App Auto Update Enabled | When selected, updates the application automatically. |
| Version | The version number of the Discovery application. |
| Current State Time | The time that corresponds with the current State. The time updated each time the State is changed. |
| Current Status | Status of the Discovery application. |
| Location | Location to be associated with the client. See Adding a Location, below. |
| Scan Through Agent Enabled | When an agent is installed on the host to be scanned, the application will leverage the agent to conduct the scan. |
| 1. | While in the Client window, with the Details tab selected, move to the Location field and click the Add button. The Location dialog box displays. |
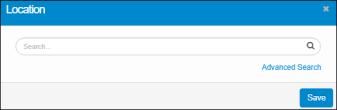
| 2. | In the Search field, type the search criteria, then click the Search button. |
| 3. | Choose a location from the results list. Only one location can be added. |
| 4. | Click Save. The Location is added to the Details tab. |
If you need to update the Location, click the Update button at the end of the field, and repeat the steps above. |
| Not all functions include an option to edit record line items shown in the main window. |
| 1. | Navigate to the window containing the record to edit. |
| 2. | Click the line containing the record. The applicable window or dialog box displays. |
| 3. | Make the necessary modifications. |
| 4. | Click Save or Add, as applicable. |
When editing an existing item, other options may be available, such as adding Tasks, Comments, and Attachments and viewing History.
| The options change based upon the function; therefore, not every option may be shown. |
| Deleting is a permanent action and cannot be undone. Deleting may affect other functionality and information in the application such as data in configured reports, fields in windows, selectable options, etc. Therefore, be sure to understand the potential effects before making a deletion. |
| 1. | Click the line that contains the item to delete. |
| 2. | From the Select Actions drop-down list, choose Delete. If a confirmation message is displayed, take the appropriate action (for example, click OK or Continue). |
Related Topics
Other Functions and Page Elements